|
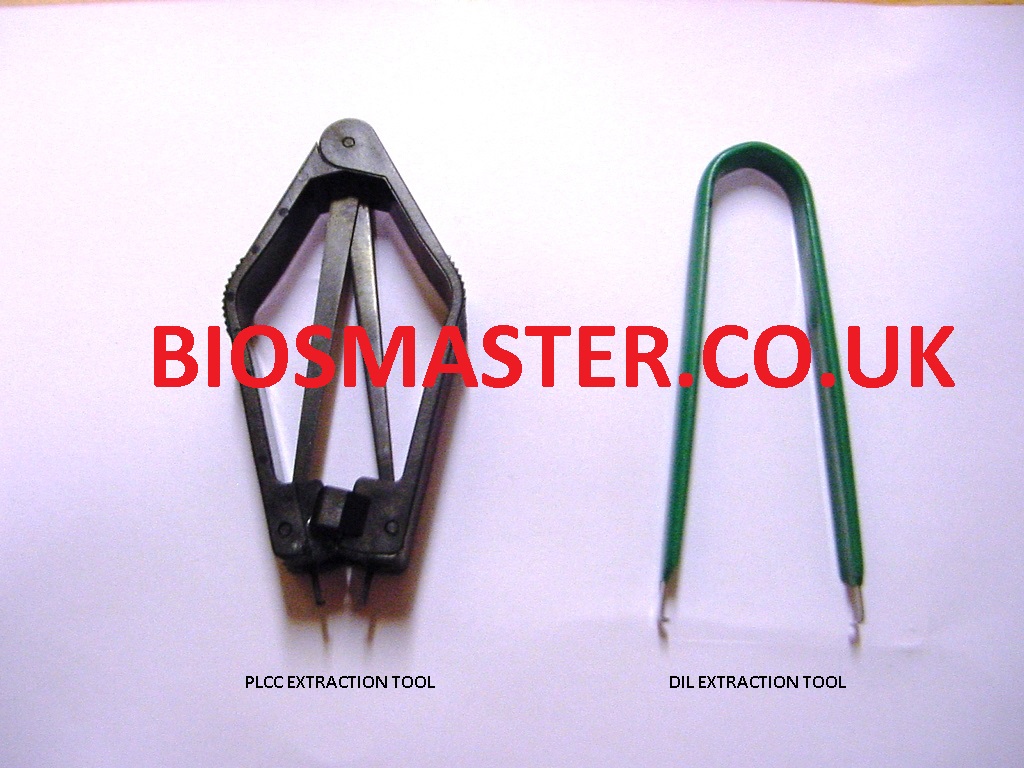
Below we show which tools are used to remove specific BIOS chips,
these are available in the online shop
Biosmaster provides this information at your own risk!
The following sequence shows how to remove PLCC and DIL devices with the
extraction tools(ENSURE ALL POWER IS OFF, CMOS BATTERY REMOVED,
OBSERVE ELECTROSTATIC HANDLING PROCEDURES) :-
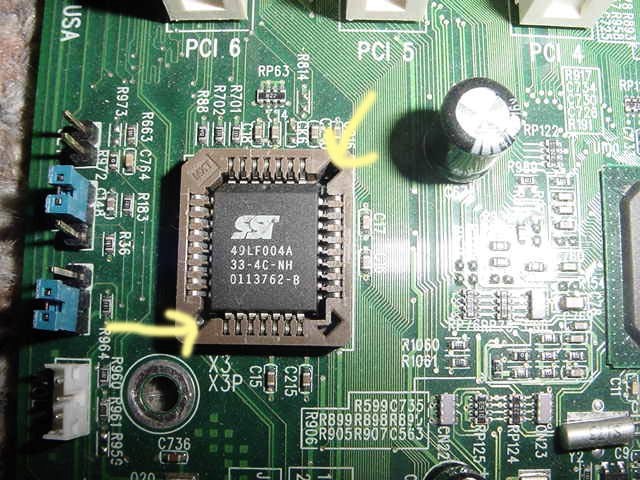
Locate prongs of PLCC extraction into the two diagonal corners of the brown socket
as marked in the diagram
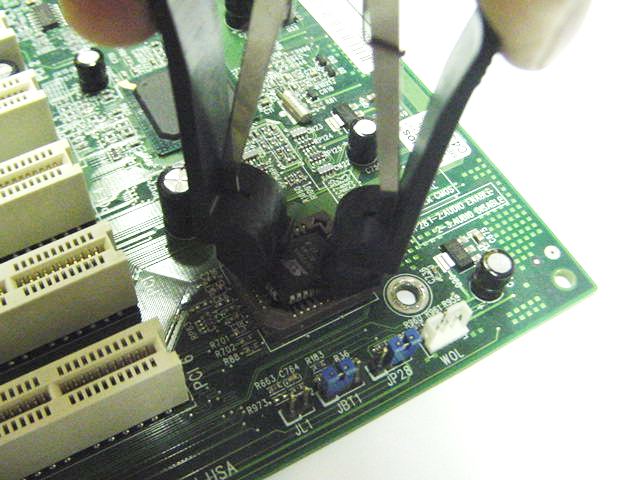
Next pressing down (light but firm), on the tool; squeeze the sides IN, and the device will
pop out!
Here we show the device out of the socket, notice the flatted corner on the device,
when refitting this must align with the flatted corner of the brown plastic socket!!!
Replacement is done by aligning flat corner on chip to flat corner on socket,
then push evenly/gently home, re-fit cmos battery and power up.

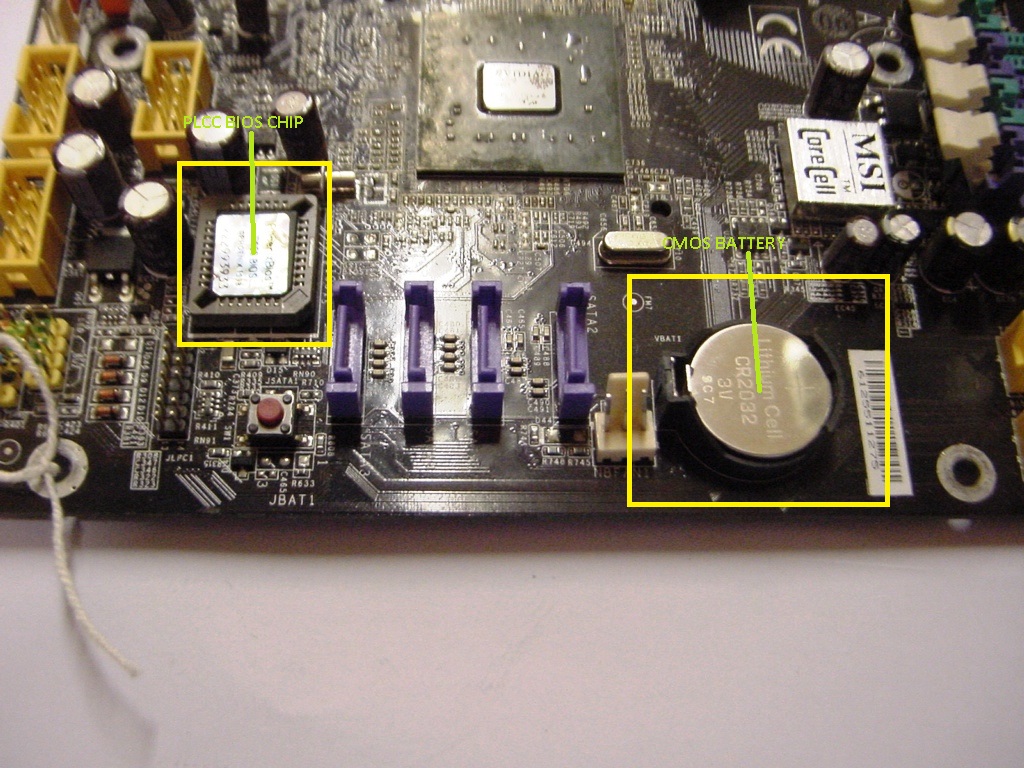
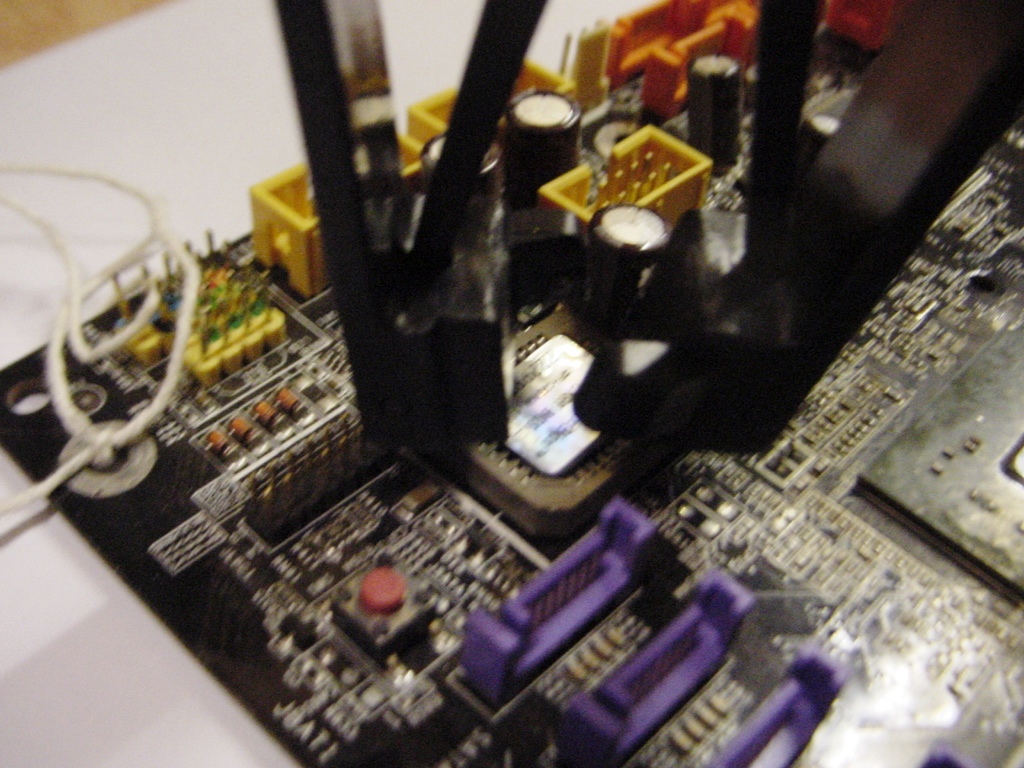
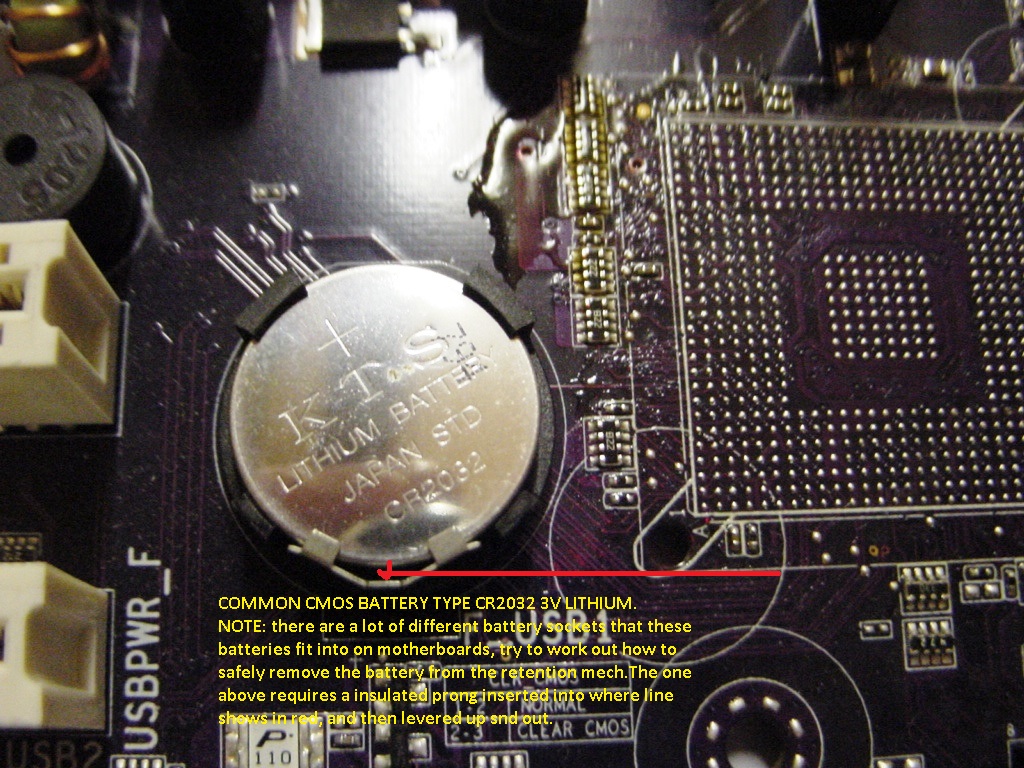
Below we show another example of PLCC chip removal note remember to remove
cmos battery first BEFORE removing bios chip.
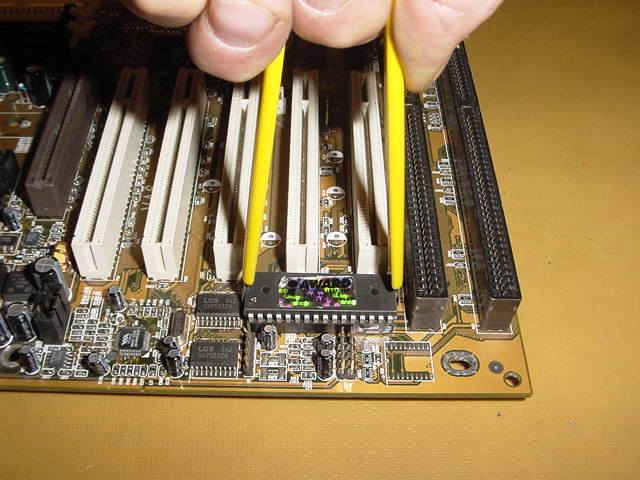
Below we show how to use the DIL extraction tool, make sure the motherboard is held down,
ease the chip out with the tool, it will pop out.
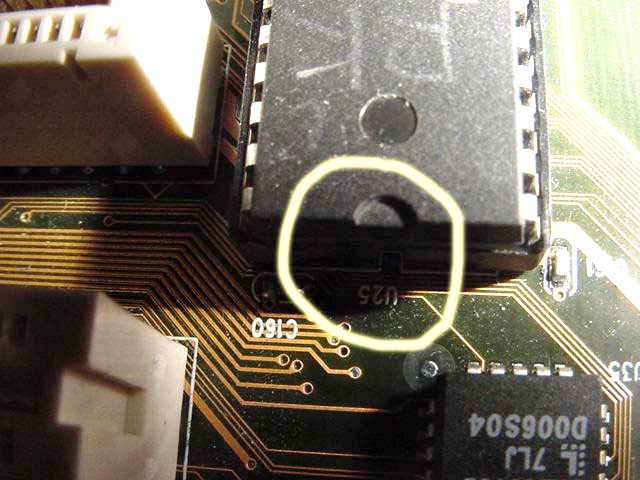
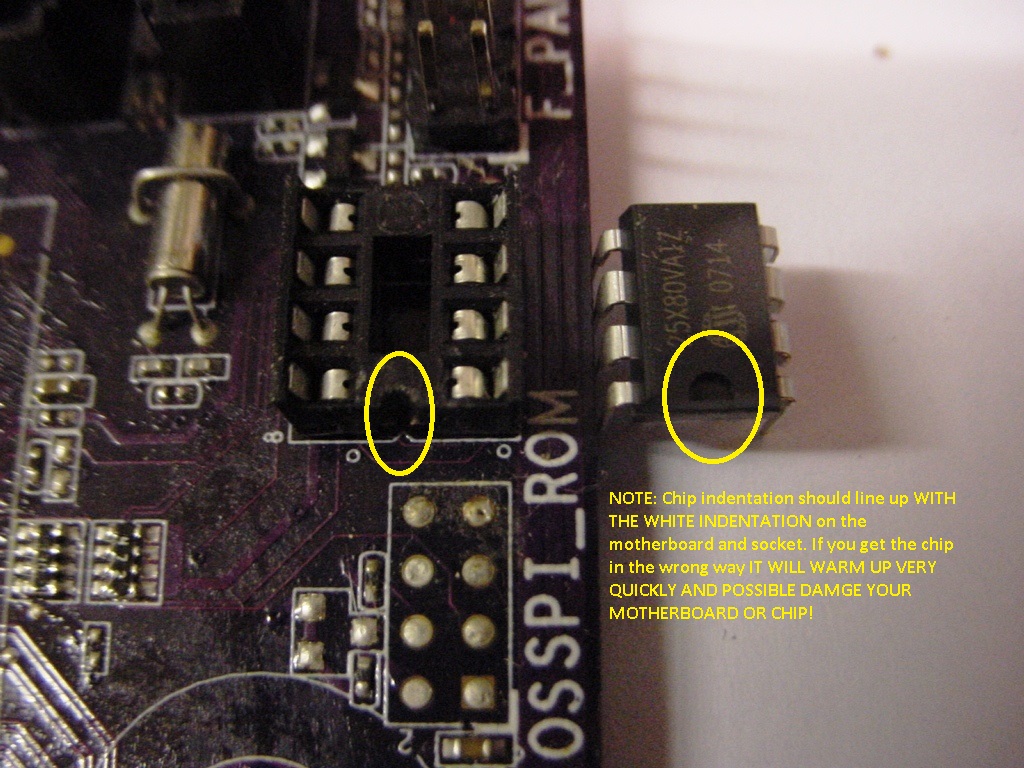
Please take notice of correct alignment when refitting the device, notice the half-moon shape
on the top of the BIOS chip. On the actual printed circuit board, one can see a white outline
marker with an indentation(shown above the upside down u25), this must be aligned with
the half-moon shape on the top oy your device.
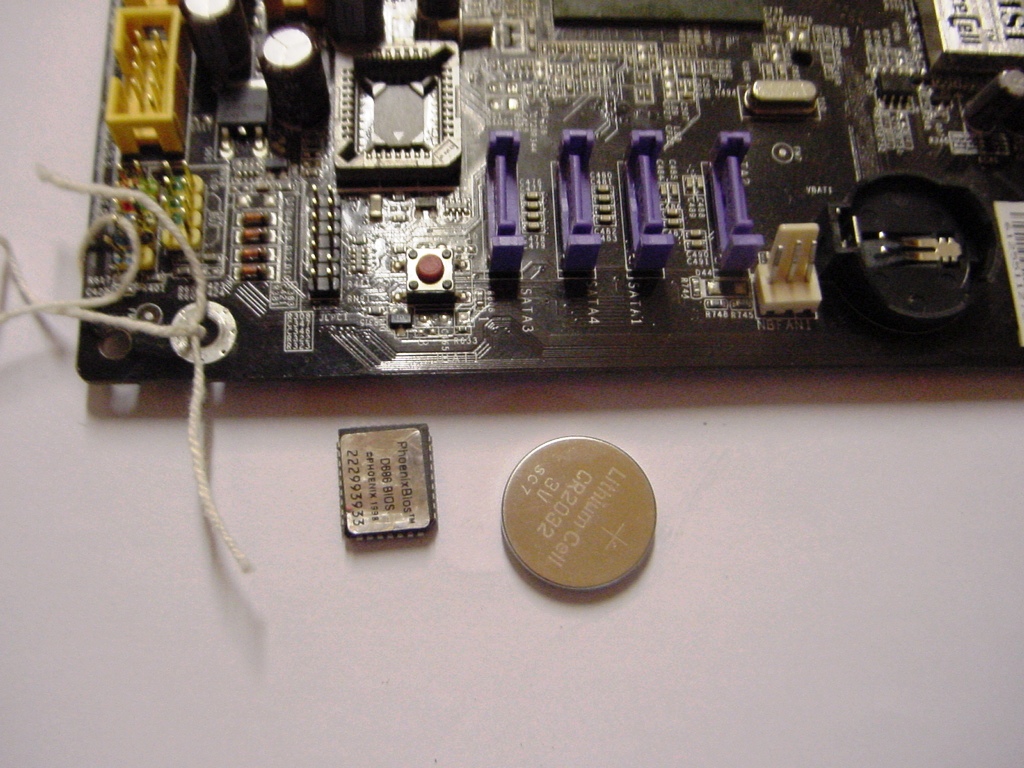
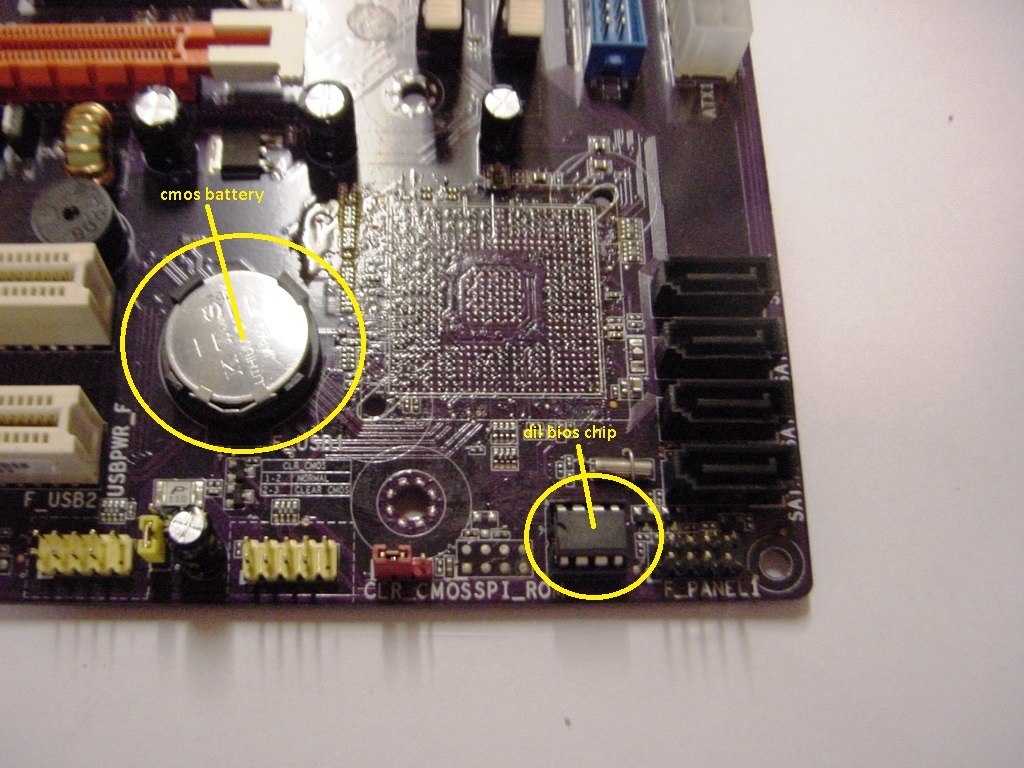
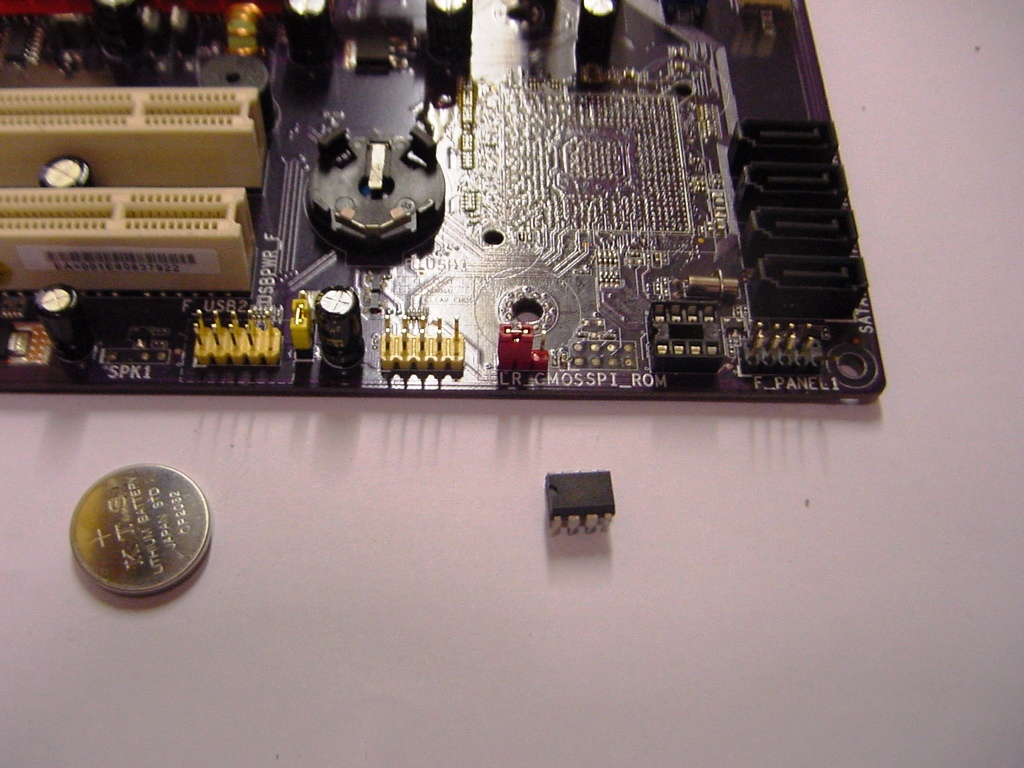
Below we show the later type DIL 8-pin chip removal, remember to remove all power and
cmos battery BEFORE removing bios chip.

|

 Categories
 Information
 Shopping Cart
 Bestsellers


